0:00 – Introduction
Hello everyone, I’m Simon Hill, Product Demonstrator at the Leicester Customer and Training Centre at Desford, UK. Today we’re going to be talking more about the 926M Ag Handler.
0:42 – Get an overview of the 296M Ag Handler
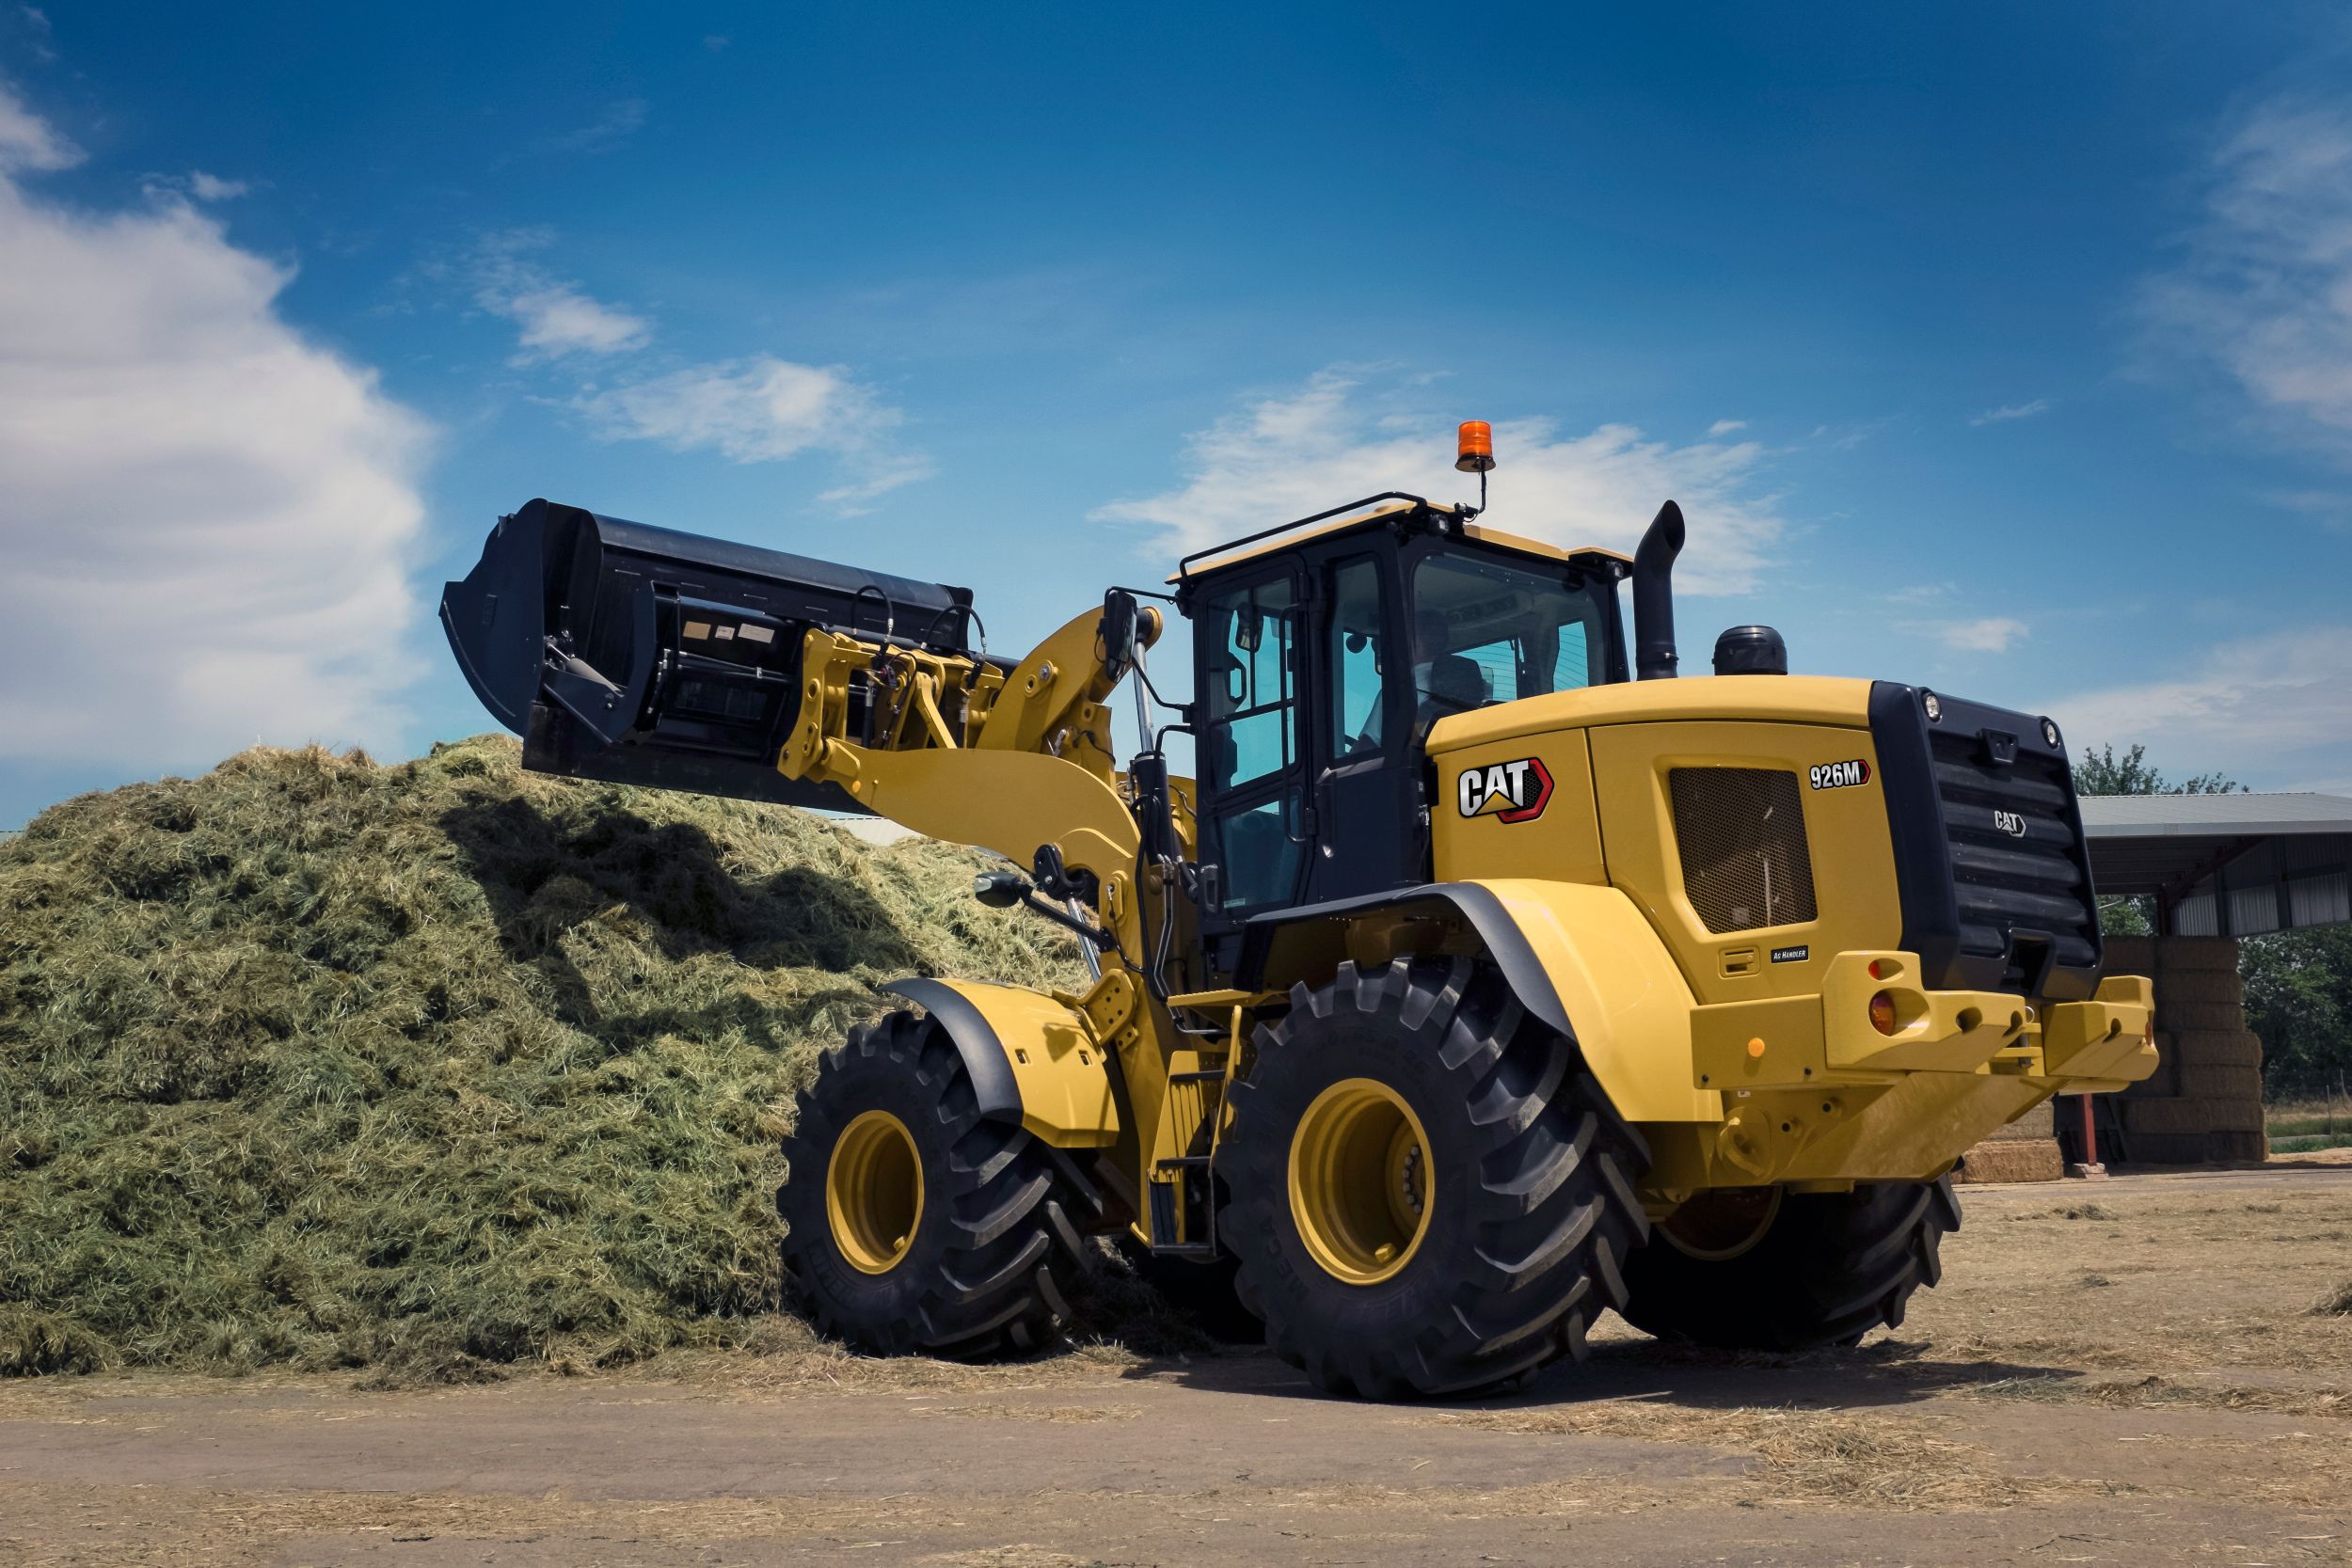
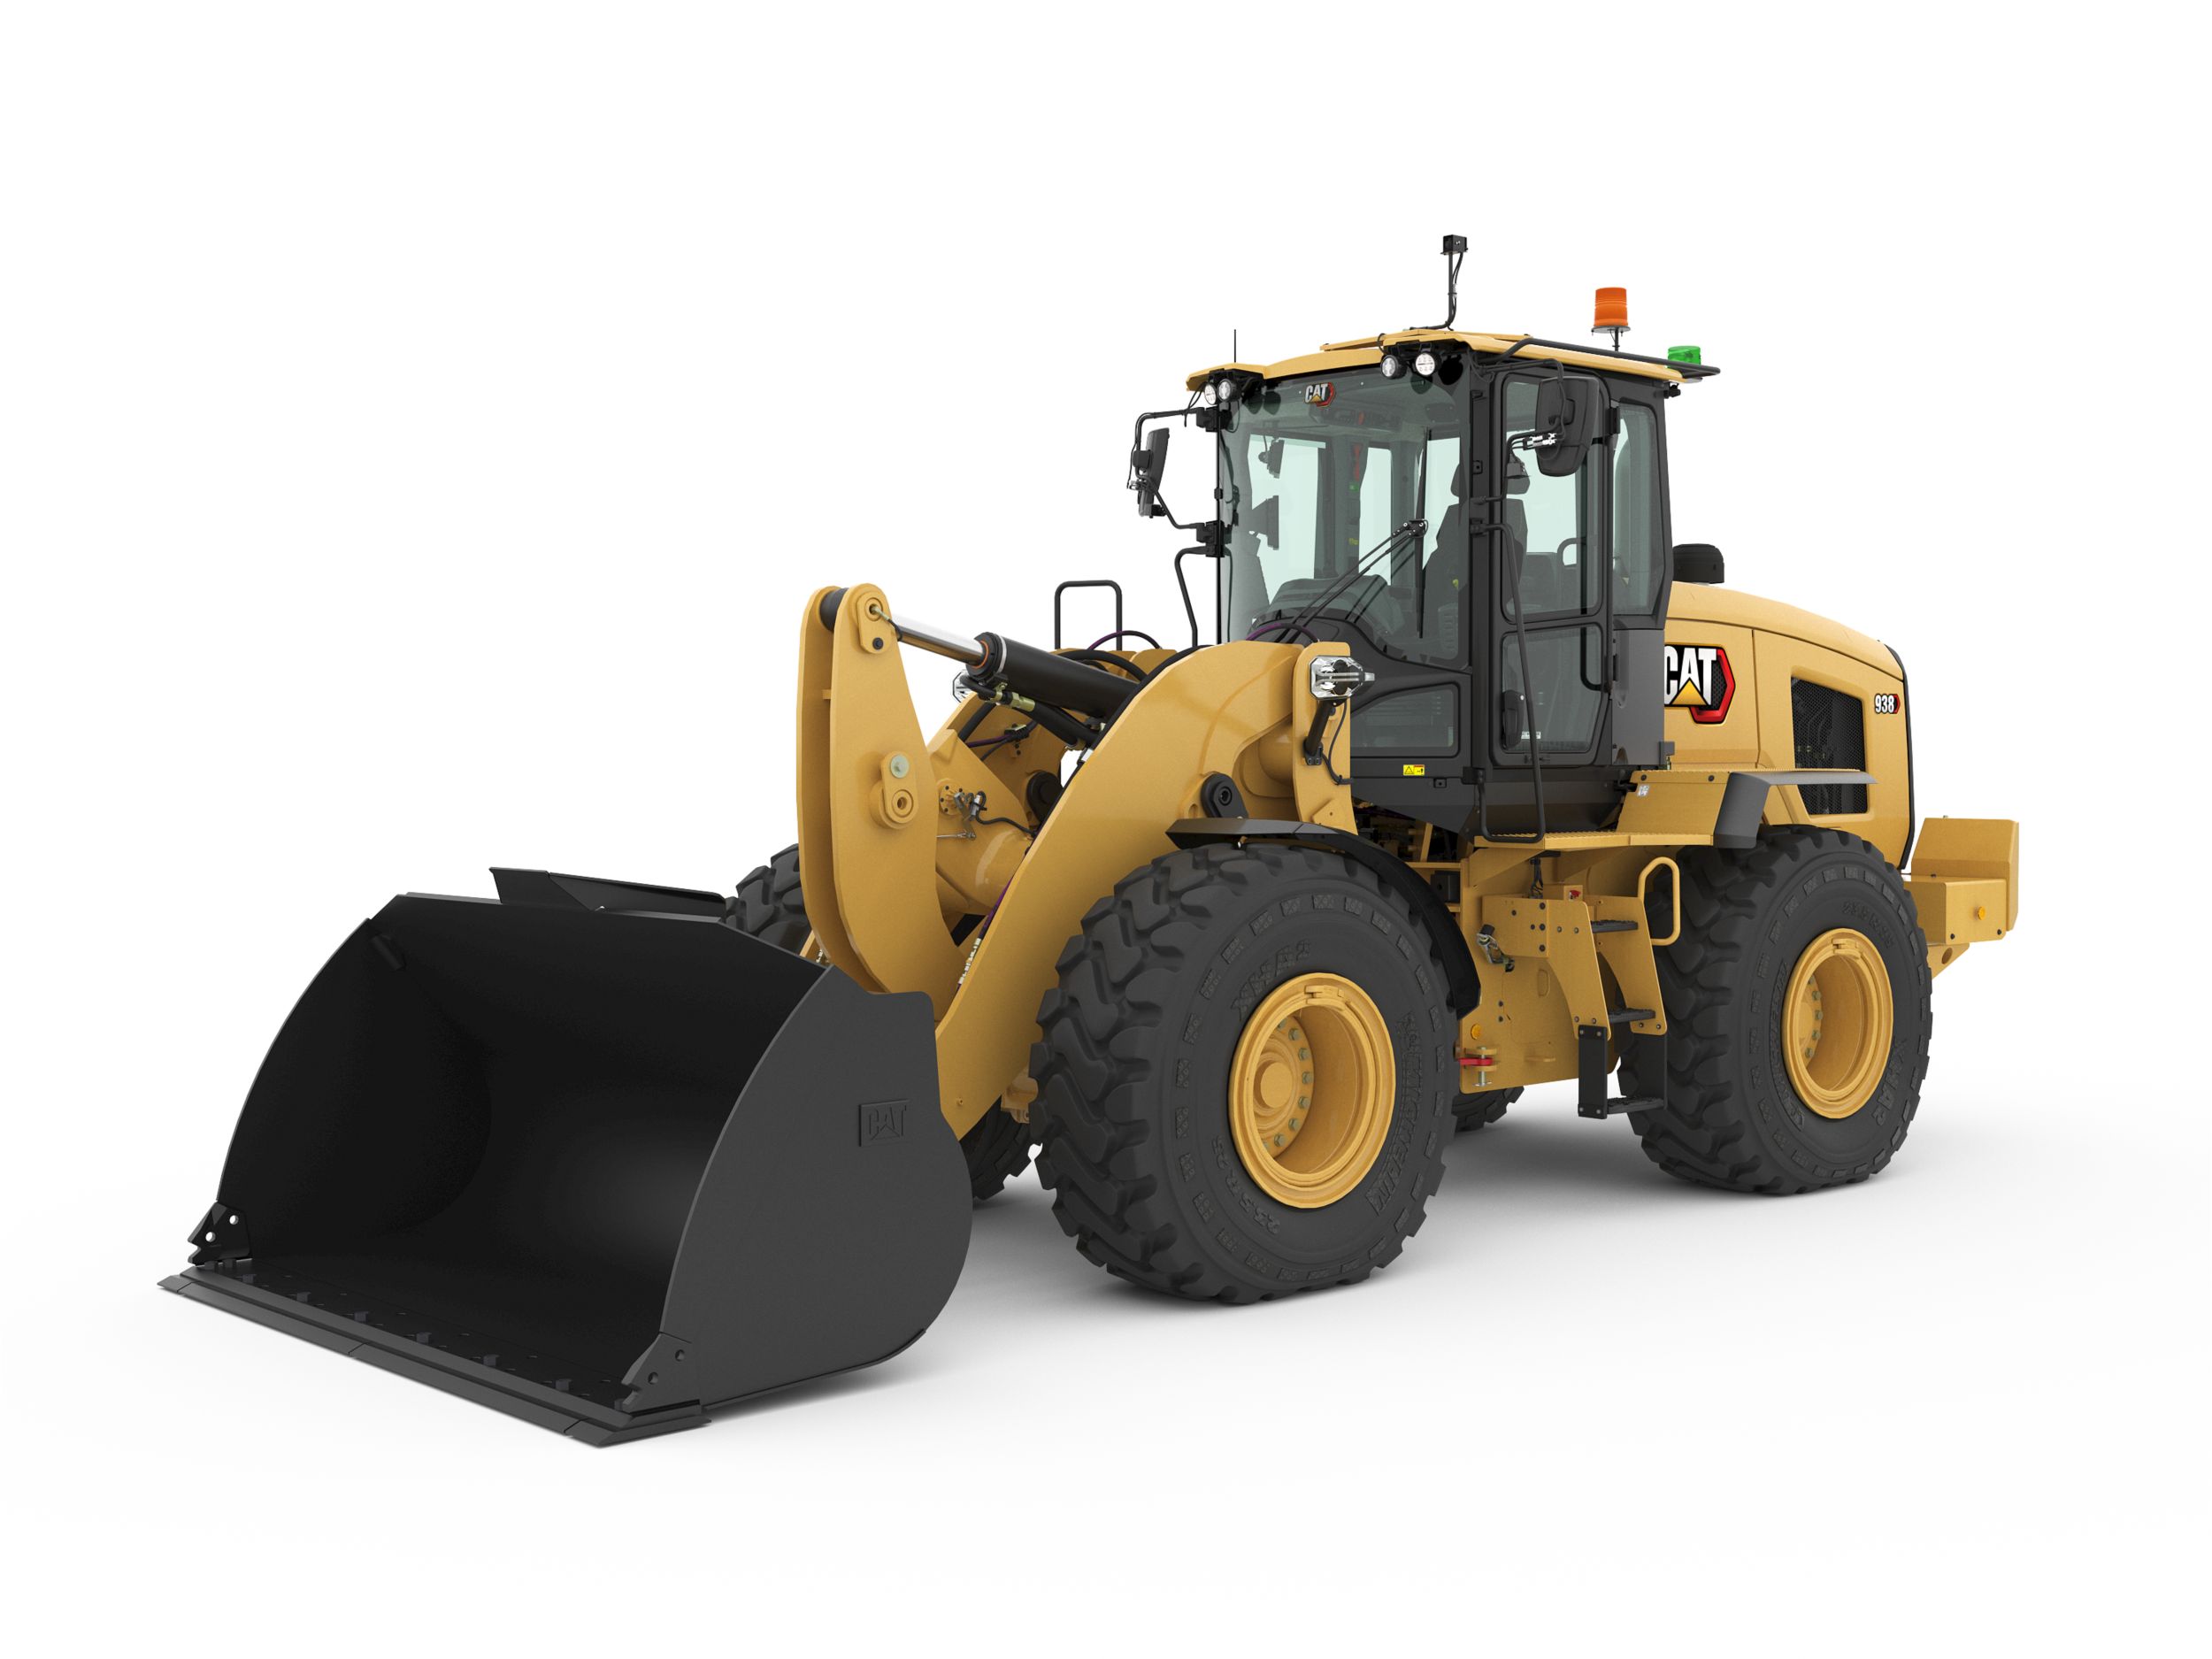
Now this 926M Ag Handler is the first one into the UK, it’s brand new and still in its shipping condition. So, before we put it to use or work on a silage clamp, there’s a few changes we need to make. For example, these tyres are going to be set to the shipping pressures so they’re going to be a lot higher for what we need on the clamp.
When working on a silage clamp you need as much tyre squash as possible, so you want the biggest contact area of the tyre on the concrete floor or in the yard. It’s going to be wet grass or the sap coming out of it, so you want to reduce any chances of slippage. So, for example, for silage clamps I’m going to set these to 25 on the front PSI and 23 PSI on the rear. Also, I would remove this side cover as you’re going to get grass rolling up and coming in the frame which on this machine is a nice open design, so the grass is going to come in and fall out, it’s all open in there. Just removing this side cover gives a little bit extra room for it to come out.
We’ve got this flexible step on here, this rubberised step bracket so, again, if this is coming into contact with the grass or material on the clamp, that’s going to flex and it’s not going to ruin the step. Around the side here, these fenders, you can either raise them by adjusting these bolts, lifting them up so you’ve still got tyre coverage for when you’re roading the machine. Or you can remove them totally if you don’t want them on there or don’t want any risk of getting material packing in there; just take them off, put them in the workshop and put them back on later in the year when you’re using it for manure.
Talking of that application, if you’re using this loader for loading manure spreaders, you want to increase the tyre pressures a little bit so I would put 35 PSI in the front for loading muck spreaders and I’d have 30 PSI in the back. Around the back we have a reverse fan so that will keep any chaff or grass clear from there. You can set it on a timer, or you can purge it. Push and hold the switch in the cab and that will purge the radiator covers to clear all the grass off.
Other features that make this machine suitable for ag is the optional limited slip rear differential at the rear, and you can have the differential engage on the go. So, even if you’re getting into a situation where you’re spinning up, just push and hold the button in, and the diff lock will engage. Once traction is met, it will then automatically disengage so there’s nothing for the operator to get involved with there. If you look at the top here you have a cyclonic pre-cleaner bowl which helps in dusty environments. If you’re in feed yards, working in grain with the grain bucket on high tip bucket, it helps to provide an extra level of protection to keep the filtration and the engine free of chaff and dust.
3:27 – Meet Product Specialist, Tom McCubbin
I’d like you to introduce you now to Tom McCubbin, he’s a Product Specialist for small wheel loaders and he’s going to tell you more about the features in the cab.
3:42 – Find out more about cab features, display settings and agricultural-specific settings
So, thank you Simon. Now I’m just going to take you through some of the settings which we can do in the display in order to maximise this machine’s performance on the silage clamp. So, the first thing I’d urge any operator to do if they are using this machine in the agricultural environment is to first of all go into ‘Operator Profiles’ and set the profile to our agriculture default settings. This will hopefully get us 90 percent of the way there in the settings, but all this stuff can be altered, and we can set specific operator codes per person and then that operator can set the machine exactly how they want it.
4:31 - Learn about the silage settings and benefits
So, first things first, for silage clamp work specifically what I would recommend is coming into ‘Machine’, ‘Settings’, ‘Powertrain Mode’ and ensuring that this machine is in ‘Torque Converter Mode’. So, what this will do is take the hydrostatic machine and make it feel like a torque converter. This will give you more roll out as you come up and down the clamp and make it less jerky and more smooth as you’re sitting in this machine all day.
The next thing I would urge you guys to do is find this button here on the six-button keypad, which is your reversing fan. If I hold that in, it will remind me to do a manual purge but if I press that once, it will put it on and into ‘Auto’ and that will blow for a specific interval, and we can set that up specific to your application and your requirements on the clamp.
Next thing we want to do is put this machine in ‘Range One’ or ‘Creeper’ and what this allows us to do is set the maximum speed of the machine going up the clamp, giving us more torque. In forward we can set the max speed but in reverse the max speed will be set at 13kph, allowing us to get back down the clamp quicker, ready to take that next trailer load away. ‘Range One’ is also where a lot of the DNA of this machine comes into it, this is where we have unique power balances, specific to the EU Ag Handler 926 which we are currently in, to really aid that climbing performance as you go up the clamp. This machine will do all the work in the background without you having to do anything apart from put this machine in ‘Range One’.
A couple of buttons across the top here are for setting your kick-outs so, again, this is something I’d urge you guys to do by getting your silage fork on the machine and getting it into position on the concrete floor where you’d like to be able to return to every time. This also works as sort of a return to dig, so we can set the silage fork so it’s perfectly level. By setting the tilt return to kick-out here, the lower kick out will allow us to set that silage fork about 10 to 20 mil off the concrete floor so we’re not damaging it but we are taking the majority of the grass away as we run through that trailer load that’s just been dumped. This will really maximise your efficiency, especially when you’re taking those trailer loads away.
Another one is HP plus, what this does is give us an additional 200 RPM. As standard, we are 1600 RPM and when I hit HP plus that is performance mode so that gives us 800 RPM and gives us maximum power and torque to allow you guys to be able to move as much grass as possible.
And then finally, we have ‘Rimpo Control’. One thing I’d urge you guys to do here is just to hold it in for two seconds, it will beep and then it will come up on the display, so for wheel slippage what this does is reduce the torque to the wheels to avoid wheel slippage and avoid tyre wear. I’d urge you guys to set this to ‘High’ to begin with to give you that maximum torque to the wheels and to be able to take that grass up the clamp as quickly as possible. However, if you do feel yourself constantly spinning and you can feel the tyres wearing on the concrete pads you can just come in here and reduce this as you see fit to your specific clamp that you are working on. So, with that, I’ll hand you back to Simon.
9:07 – Wrap-up and close
Well thanks for explaining the interior features, Tom, on the display. We look forward to seeing you in the next video.