If you already have an existing account with another Cat App, you can use the same account to sign in here.
One Account. All of Cat.
Your Caterpillar account is the single account you use to log in to select services and applications we offer. Shop for parts and machines online, manage your fleet, go mobile, and more.
Account Information
Site Settings
Security
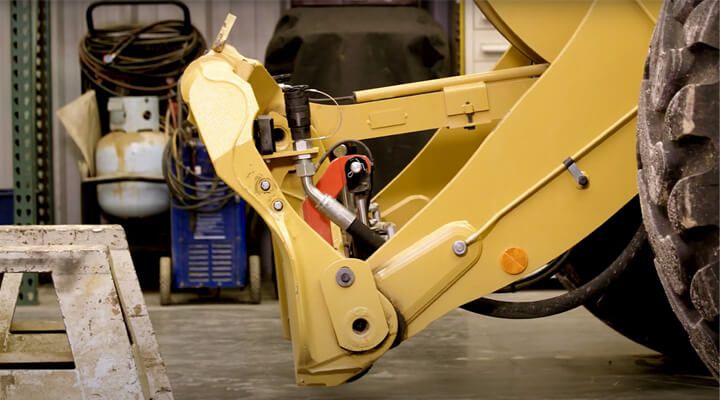
Step-by-Step: Replacing a Cat® Linkage Pin
Estimated read time: 3 minutes
Linkage pins allow a lot of your equipment’s parts and systems to operate smoothly. And you know the frustration of downtime caused by needing to replace a seal or service a cylinder. At some point, you'll need to remove and reinstall linkage pins, and the process can seem daunting if you're not sure where to start.
This guide will walk you through removing and installing the linkage pin on a Cat® 938M Wheel Loader bucket. While we’re using this specific model, the steps are generally applicable to most Cat equipment.
Before starting, always check your Operation and Maintenance Manual (OMM) for safety procedures and wear the appropriate personal protective equipment (PPE).
Prepare for service
Remember, the process might be different on your equipment. For this 938M with a quick coupler:
Level the machine: Ensure your equipment is on solid, level ground.
Position the attachment: Lower the attachment just above the ground at a slight downward angle.
Engage the parking brake: Set the parking brake, then move the joystick to float the attachment so it rests flat on the ground.
Support all components: Secure the bucket, linkage and any other parts that could move during the process. This is critical because cylinders and related components are very heavy and could pose a safety risk.
Be cautious of grease lines: Make sure you don’t damage any grease lines, and move components that might obstruct your work.
Pin Removal
Once everything is safely secured, you’re ready to start removing the linkage pin.
Remove the keeper bolts: Begin by taking off the bolts on the keeper.
Take off the keeper and snap ring: Once these are removed, carefully tap out the linkage pin using a hammer.
Inspect for damage: Check the pin for any signs of galling, cracks or broken welds. Look inside the sleeve bearing for damage as well. If the pin is damaged, replace it with a new one.
Pin Installation
After you’ve removed the damaged or worn linkage pin, it’s time to install the new one.
Clean excess grease: Wipe off any excess grease with a cloth to remove contaminants before you begin installation.
Align the dogbone: Lower the dogbone to line it up with the holes in the coupler.
Insert the pin: Insert the new linkage pin, and if necessary, use a deadblow hammer to seat it properly.
Reinstall the snap ring and keeper bolts: Once the pin is in place, reinstall the snap ring and tighten the keeper bolts.
Reattach any moved components: Reinstall anything you had to move, like grease lines or hoses, to finish the job.
Final steps
If your machine doesn’t have an automatic lubrication (autolube) system, manually grease the fitting once you’re done. Even if you have autolube, check joints daily to make sure grease is flowing properly. And here's a video that goes through tips for inspecting and greasing linkage pins.
For more detailed instructions specific to your equipment, consider looking into Cat Self-Service Options (SSO). This resource covers Cat parts, service instructions and recommended tools.
For more information and support, contact your Cat dealer. And always check your Operation and Maintenance Manual for specific instruction and safety procedures.